How to Plant and Germinate Artichoke Seeds: A Step-by-Step Guide
Here’s a consolidated and streamlined version of the content without redundancy and better flow to ensure all essential details are presented:
How to Plant, Germinate, and Vernalize Artichoke Seeds: A Complete Guide
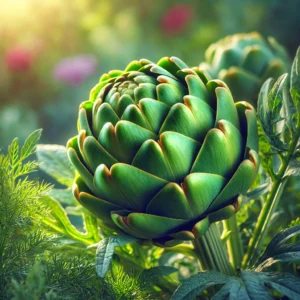
Artichokes are known for their unique flavor and edible flower buds, and they are surprisingly easy to grow from seeds.
Though the process requires patience and care, it can be gratifying. Here’s how to plant, germinate, and successfully vernalize artichoke seeds:
1. Choosing Artichoke Seeds
Begin by selecting high-quality artichoke seeds.
Popular varieties like Green Globe and Imperial Star are known for their productivity and flavor. Purchase seeds from a reliable source to ensure reasonable germination rates.
2. When to Plant
Artichokes need a head start before they go outdoors.
Start the seeds indoors approximately 8-12 weeks before the last expected frost in your area. This allows seedlings enough time to mature before transplanting.

3. Starting Seeds Indoors
- Container and Soil Preparation: Use seed-starting trays or small pots filled with a well-draining seed-starting mix. Peat pots also work well for easy transplanting.
- Planting Depth: Sow the seeds about 1/4 inch deep. Cover lightly with soil and press gently.
- Watering: Keep the soil moist (not waterlogged) to ensure a good germination environment.
- Temperature and Light Requirements: Place the trays in a warm location. The ideal temperature for germination is 70-75°F (21-24°C). Use a grow light or sunny window to provide 12-16 hours of light per day.
4. Germination Process
- Germination Timeline: Artichoke seeds usually germinate in 10-14 days.
Landscaping Ideas Affiliate Embed 🌿 Transform Your Entire Outdoor Space
Beyond vegetables – create a complete landscape design Get 7000+ Landscaping Ideas →
*Affiliate link – supports our gardening content
- Humidity: To create a humid environment, cover the trays with plastic wrap or a dome. Remove the cover once you see sprouts.
- Thin Seedlings: Thin out the seedlings by removing weaker ones, allowing the more vigorous plants to grow without competition.
5. Vernalization: The Importance of Cold Exposure
Artichokes require vernalization to develop flower buds. This cold exposure can be simulated after the seedlings have at least 4 true leaves.
- Temperature Requirements: To initiate bud development, expose the seedlings to temperatures of around 40-50°F (4-10°C) for 10-14 days. Some sources recommend exposure for up to 4 weeks.
- Vernalization Methods:
- Move Outdoors: If outdoor temperatures are consistently between 40-50°F, move the seedlings outdoors for 10-14 days.
- Cold Frame or Unheated Greenhouse: These structures help maintain the ideal temperature while protecting plants from frost.
- Refrigerator: Alternatively, place seedlings in a fridge set to around 40°F (4°C) for 10-14 days. Some recommend providing light during this time, but it is not always necessary.
6. Transplanting Seedlings
- Hardening Off: To help seedlings acclimate, gradually expose them to outdoor conditions over 7-10 days. Start by placing them in a shaded spot and gradually increase sun exposure.
- Soil Preparation: Choose rich, well-drained soil and amend it with compost or aged manure.
- Spacing: Transplant seedlings when temperatures are consistently above 50°F (10°C). Space them 3-4 feet apart to accommodate their mature size.
7. Growing Conditions for Artichokes
- Long Growing Season: Artichokes require at least 180 days of mild temperatures.
- Temperature Preference: They grow best in 70s°F (21-26°C). Avoid scorching weather above 85°F (29°C).
- Sunlight: They need full sun or at least 6-8 hours of direct sunlight daily.
- Soil Type: Loamy, well-drained soil with a pH between 6.5 and 7.0 is ideal.
- Watering: Artichokes are thirsty plants, so water deeply but allow the top inch of soil to dry between waterings.
- Frost Protection: Protect young plants from frost, especially during early spring.
8. Care Tips for Growing Artichokes
- Mulching: Mulch helps retain moisture and control weeds.
- Fertilizing: Fertilize every 4-6 weeks using a balanced fertilizer.
- Pest Control: Watch for aphids, snails, and slugs. Use organic methods such as neem oil or diatomaceous earth.
- Disease Prevention: Ensure good airflow to prevent fungal issues. Avoid overhead watering to keep leaves dry.
9. Harvesting Artichokes
Artichokes are generally ready to harvest in their second year, though some varieties, like Imperial Star, can be harvested in their first year. Harvest the buds when they are still tight and about the size of a baseball. Cut along with 1-2 inches of stem.
After Vernalization and Transplanting
- Gradual Reintroduction to Warm Temperatures: Gradually warm up the seedlings to avoid shock after vernalization.
- Transplant Outdoors: Transplant after the last frost date, ensuring conditions are right for growth.
- Avoid Frost: Frost can damage or kill young plants, so protect them until they’re mature.
- Maintain Moist Soil: During vernalization and transplanting, keep the soil moist but not waterlogged to prevent stress.
Summary of Vernalization and Growing Steps
- Start Seeds Indoors: 8-12 weeks before the last frost.
- Vernalize Seedlings: At four true leaves, expose to 40-50°F for 10-14 days.
- Methods: Use outdoor exposure, cold frames, or refrigeration.
- Light Considerations: Provide light, if possible, during refrigeration.
- Reintroduce to Warm Temperatures: Gradually increase temperature.
- Transplant Outdoors: After the last frost, when consistently above 50°F.
Growing artichokes from seed involves careful planning, vernalization, and ongoing care. Patience and attention to these details will reward you with healthy plants and a delicious harvest.


